| |
How to change the oil and filter on a TDI
Fancy doing your own oil and filter change on a VAG group (VW, Audi, Seat, Skoda) TDI ?
It's a fairly simple task, well within the scope of even the most inexperienced mechanic - so why pay a dealer or garage
when you can do it yourself ?
This guide takes you step by step through the procedure, showing what tools are needed.
The same engine is widely used throughout the Volkswagen, Audi, Seat, and Skoda range, so this guide applies to many different
models. The photos below are actually taken of my VW Passat TDI, but it's the same engine as in my Seat Ibiza TDI Sport.
DISCLAIMER: Follow this guide at your own risk. I accept no responsibility for any resulting injury or
damage that may occur, or for any mistakes I might have made. If in doubt - get a professional to do the job. I recommend
that protective gloves be worn throughout this procedure, to prevent contact between skin and used engine oil which is
Bad For You. Always read instructions and safety precautions on any products & tools used. Take extreme care working in
the engine bay, if the engine is hot you could burn yourself, or cooling fans could start without warning.
Also note that if your car is still under warranty, you have to get it serviced by a garage using genuine parts to maintain
the warranty cover.
Finally - take UTMOST care not to allow ANY bits of dirt into the engine.
Tools Required
To complete this task, the following will be required:
- Oil extractor - I use a Pela 6000 suction extractor. You can buy these online for around £30.
- Tool to remove oil filter cap - a purpose-designed tool is available, alternatively use a strap wrench with a ratchet
drive.
- Oil - approximately 4 - 4.5 litres will be required. Buy a 5 litre can and you'll have a bit spare for top-ups. IMPORTANT
- see oil info below.
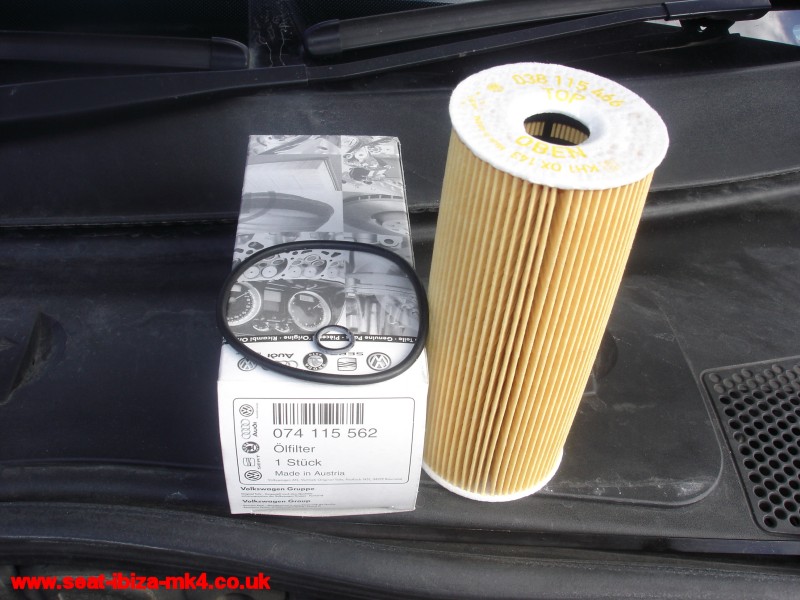
- Oil filter - I recommend getting one from your main dealer. Not expensive, guaranteed quality, and come with replacement
O rings.
- Plenty of clean rags or tissue. These WILL be needed !
- A suitable bag or container to place the used filter and oily rags in
- Protective gloves are recommended.
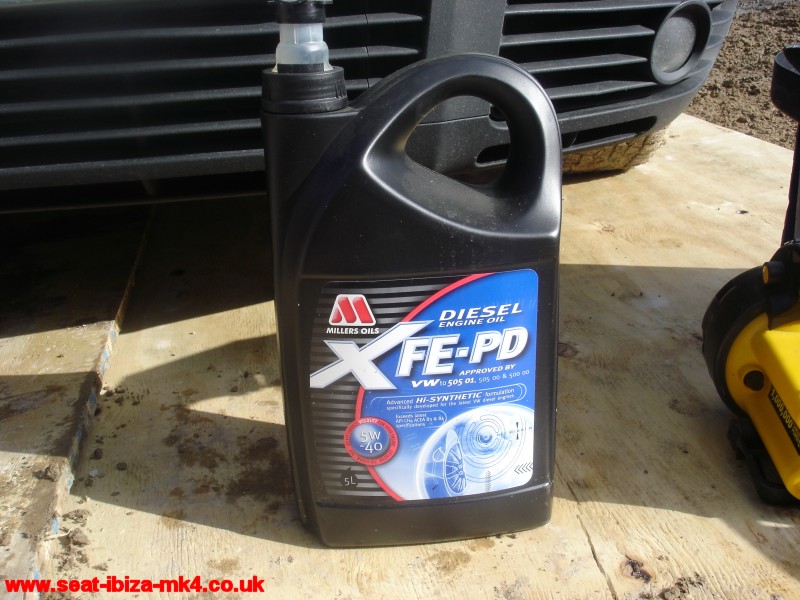
What oil do I need ?
The VAG (Volkswagen, Audi, Seat and Skoda) TDI PD engines require a special grade of oil that meets a VW specification.
You MUST use the right oil, otherwise premature wear to the camshaft lobes will occur.
How do you know what oil to use ? Well first - read your car handbook. This will tell you. If you don't understand it,
either ask your dealer, or ask some fellow owners on SeatCupra.net, it's
a commonly discussed subject. Have a read of this
thread on SeatCupra.net.
Don't rely on your local car accessory shop to give you the right stuff, they often don't, and lots of diesel engine oils
don't meet the spec !
How to do it
- Removal of the oil will be quicker if the oil is warm - as it flows more easily.
So if the car is cold, either go for a short drive, or run the engine for 10 minutes.
If the car is already at full operating temperature, leave it half an hour or so, so it's not too hot.
- Park the car in a suitable place. Remember, you should NEVER start an engine without oil in, so make sure you won't
be in anyone's way for the next 30 mins to an hour.
- Apply the handbrake firmly, turn the engine off, open the bonnet and prop it up securely. If it's windy - take great
care, bonnets can lift off their props in the wind and slam shut while you're underneath. It happened to me and trust
me, it hurts.
- To be pedantic, I suppose I should recommend you disconnect the battery (if you do, make sure you've got your radio
code).
- Gather all the tools together, and make sure you have plenty of clean rags or tissue within arms reach.
- Put your protective gloves on.
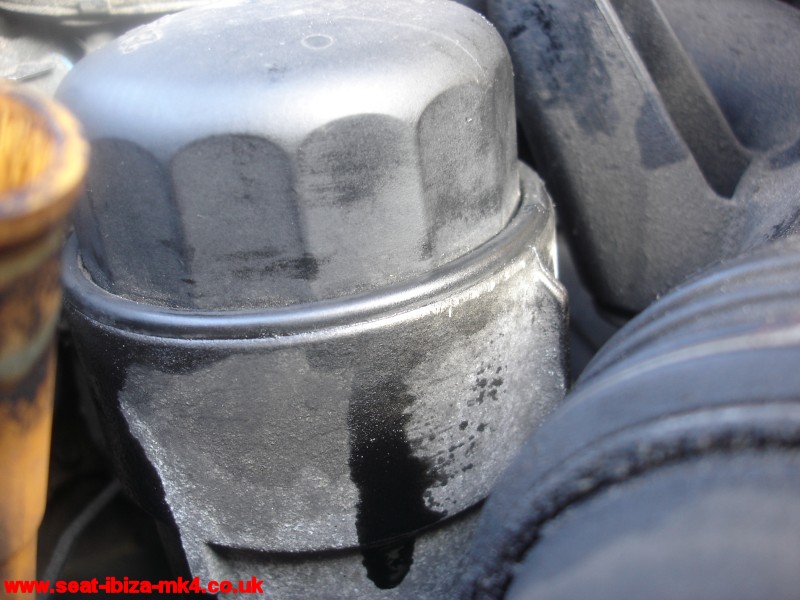
- Locate the oil filter housing in the engine bay. It has a large black plastic cap moulded into a hexagon shape.
In the Seat Ibiza Mk4, and other cars with transverse (side-to-side) engines, it's conveniently right at the front of
the engine.
In cars such as the VW Passat with longitudinal (lengthways) engines, it is to the side.
Some cars may require an engine cover to be removed. They either pop off with a gentle tug, or need a few screws undoing
(these may be hidden under plastic caps that need prising out)
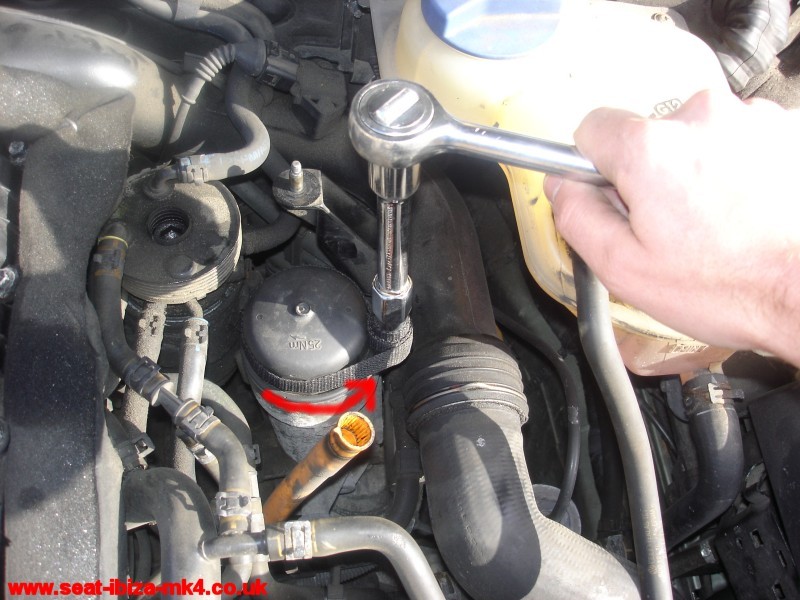
- The first task is to loosen the oil filter cap. These are often much tighter than they need to be, so a tool is needed
to turn them.
Specially-designed tools are available that fit the hexagonal filter cap and attach to a ratchet drive - however I successfully
used a cheap strap wrench - see photo below. Don't be tempted to use a chain wrench, it will damage the plastic cap.
Remember - it's anti-clockwise to undo.
- With a clean piece of rag or tissue in one hand, unscrew the filter cap and lift it out with the other. Be prepared
to catch drips of oil with rag - see photo below:
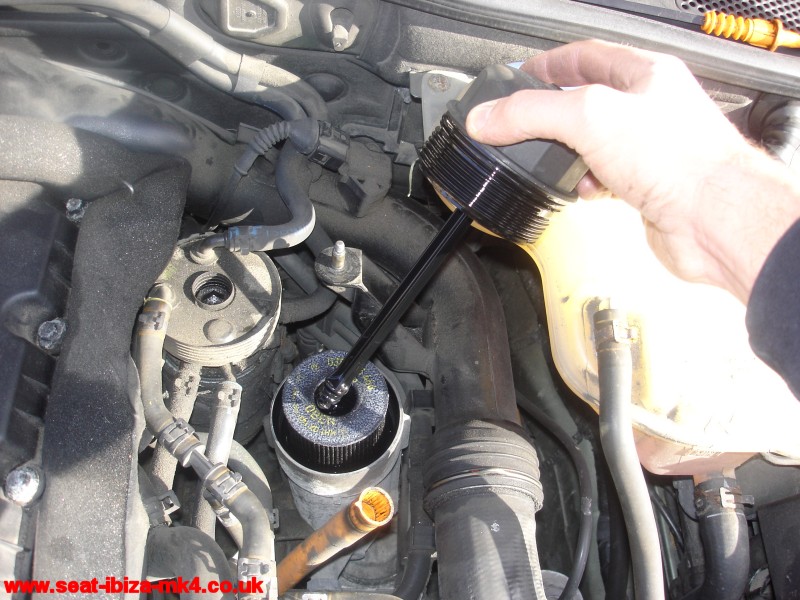
- Wipe the filter cap clean with the rag and put it down somewhere clean.
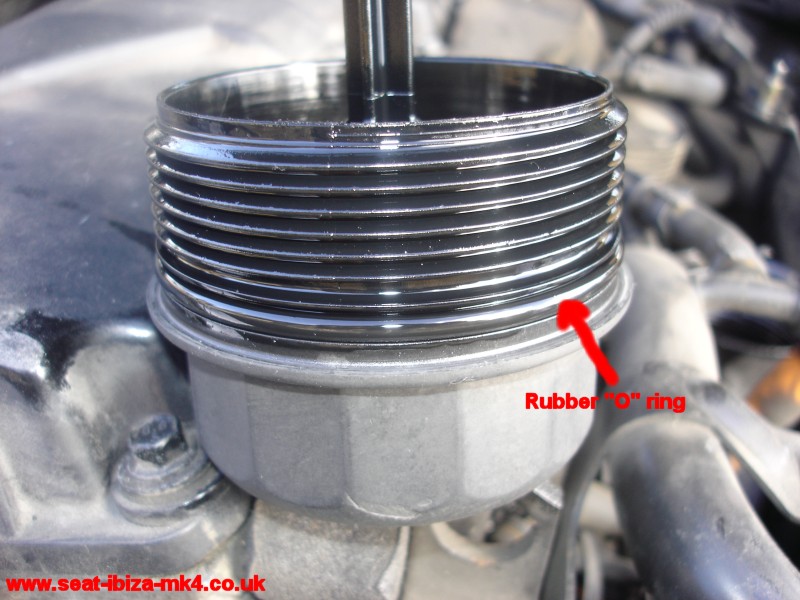
- With the new filter should be 2 new rubber O rings -1 large & 1 small - locate them, see photo below:
Using a small flat bladed screwdriver or similar, remove the old small rubber O ring, and replace with the new one - see
photo below:
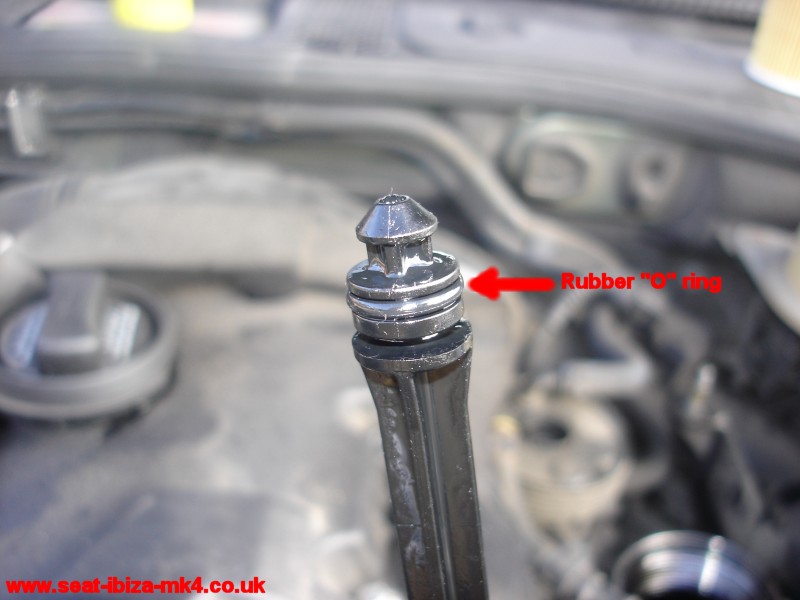
Now replace the large rubber O ring - see photo below:
- Now put the cap down somewhere clean.
- Before removing the old filter, get hold of a suitable disposal bag, and hold it open right next to the filter. Get
some more clean rag or tissue ready.
- Lift out the old filter, and drop it straight into the bag - see photo below:
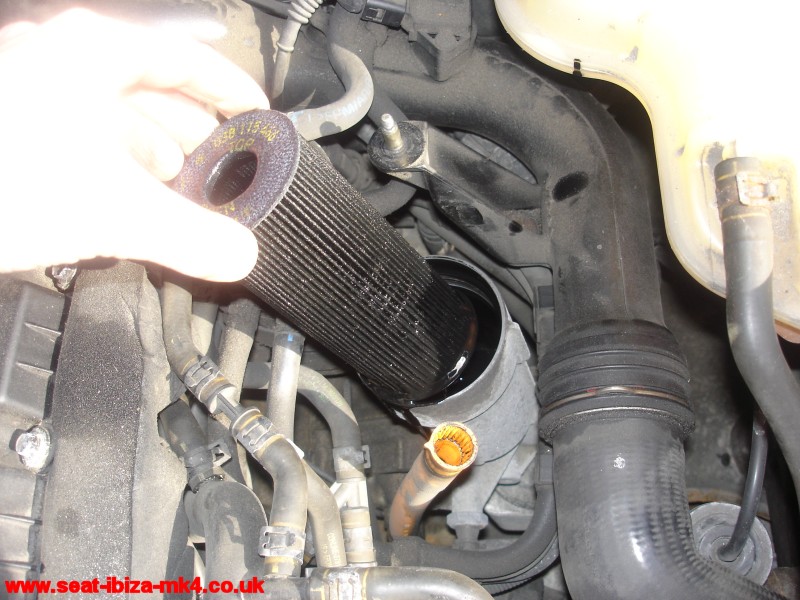
- Wipe up any oil spills with rags or tissue.
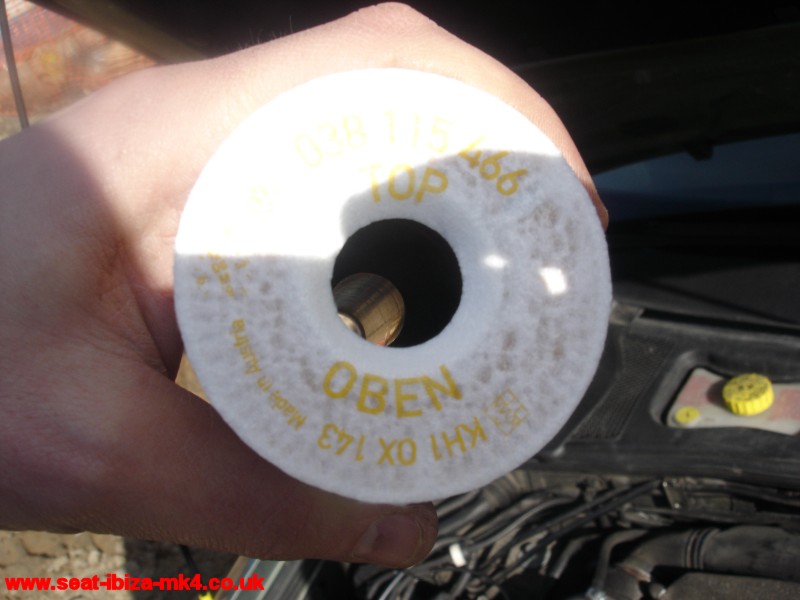
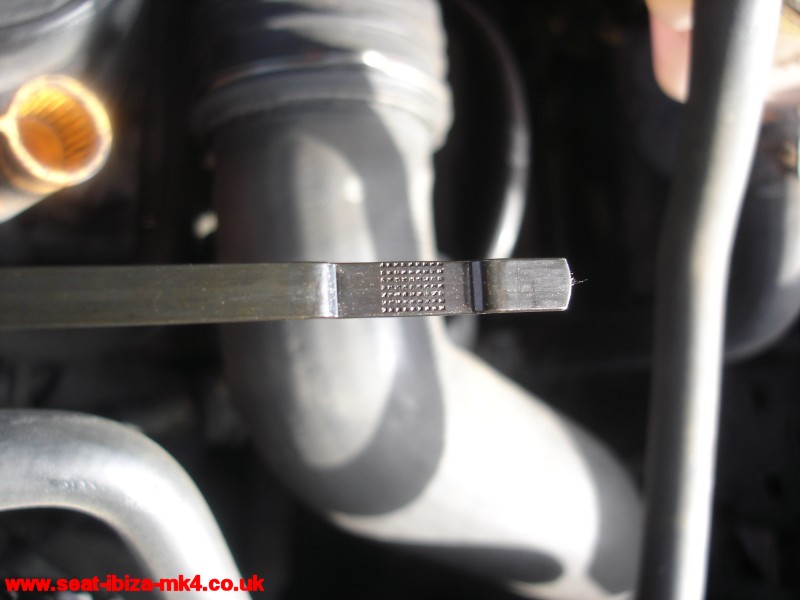
- Locate the new filter, and have a look at it. It should have "TOP" marked on one end. If not, look inside - the bottom
half of the filter should have a narrow tube inside, see photo below:
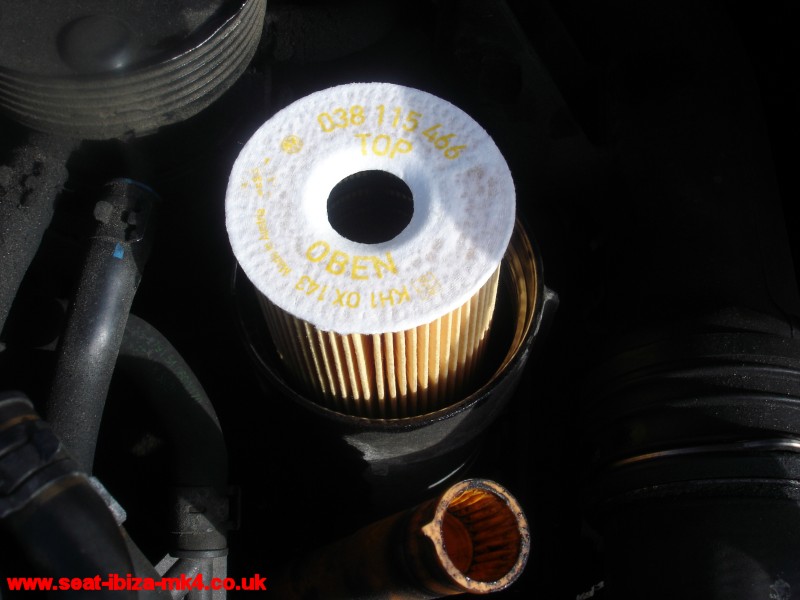
- Drop the new oil filter into the housing - see photo below:
- Locate the filter cap, check it's throughly clean and both new O rings are fitted correctly.
Insert it right down into the filter, and start screwing the cap down.
Tighten the cap right down, as tightly as possible by hand, until it won't go any further and there is no gap visible
between the plastic cap and metal housing - see photo below:
- If you have a torque wrench and suitable tools, tighten the cap to the torque value stamped on it. It's not a high
value.
Alternatively, use whatever method you used to remove the cap but in reverse, and just "nip" it up to make
sure it doesn't tighten any further. It doesn't have to be mega tight, if it is you'll never get it off next time.
.
- Wipe up any spilt oil around the filter cap, otherwise when you start the engine later you won't know if the oil was
spilt or has leaked out.
- Right, now it's time to change the oil.
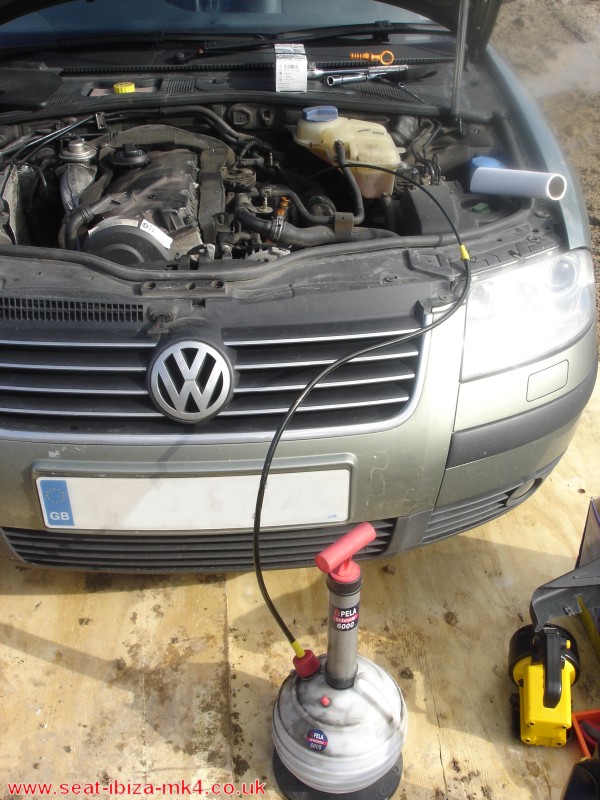
- Assemble the Pela 6000 as per the instructions.
- Pull the oil dipstick right out of the tube at the side of the engine, wipe it clean and put it down somewhere clean.
- Take the narrow-bore tube of the Pela oil extractor, and push it right down the dipstick tube until it reaches the
bottom of the engine sump. It should feel obvious when it reaches the bottom.
- Start pumping the oil extractor as per the instructions to suck the oil out. This will take a little while, depending
on how warm/thin the oil is, and you'll need to keep pumping up the pressure regularly to keep the flow going. See photo
below:
- When all the oil is removed, you'll hear a gurgling sound like you do when reaching the bottom of a drink with a straw.
Make sure the pipe is still pushed right to the bottom of the engine and give one or two more pumps to make sure. When
all the oil is gone, you'll feel the pumping is much easier.
- Get another bit of rag, then pull the pipe right out of the dipstick tube, cleaning it as you go. Put the Pela to one
side. I usually hook the end of the pipe up somewhere high so all the oil drains down into the Pela reservoir and not
onto the garage floor.
- Give the dipstick another clean, make sure there is no dirt on it, and put it back in the engine.
- Remove the oil filler cap, it's on the top of the engine. Put it to one side, upside down.
CAUTION: There is often a build-up of dirt around the filler cap. Remove the cap carefully so none of it drops into the
engine, and take care not to knock any in.
- Get your can of oil and open it. You may need to pull the cap and spout up out of the bottle and remove a plastic seal
- see photo below:
- Start pouring the oil SLOWLY into the engine. A couple of tips:
Firstly - hold the spout low down and close to the filler hole. Otherwise every time the wind blows, the oil will go
everywhere.
Secondly - be patient and pour the oil slowly, you'll be able to aim it properly. If you pour it quickly, it will "glug"
and oil will go everywhere.
- Pour about 3 litres into the engine. Most oil cans have a gauge on the side so you know how much you've poured in.
- Wait a minute or so to allow the new, cold oil to drain into the sump.
- Remove the dipstick and see if the oil has reached it yet. You should aim for the oil level to be within the hatched
area of the dipstick - see photo below:
- The oil will reach the hatched area, but this is an artificially high reading because the oil filter hasn't filled
yet.
- Continue adding small amounts of oil until it reaches the hatched area. Every time you remove the dipstick, clean it
with CLEAN rag/tissue after you've checked the level.
- Once it's reached the hatched area, do the following:
1) Refit the oil filler cap
2) Put the cap on your oil bottle so no dirt drops in
3) Remove ALL tools, rags etc from the engine bay
4) Make sure it's not in gear, start the engine, and let it idle for 10 seconds. DO NOT touch the accelerator or rev
the engine.
5) Switch the engine off, remove keys, and wait at least a minute for the oil to settle.
- Check the oil level again - you will find it has dropped quite a bit (maybe off the dipstick) now that the oil filter
is filled.
- Continue adding oil in small amounts and checking the level (remembering to clean the dipstick after each reading).
Stop when it reaches the upper end of the hatched area on the dipstick.
Wait a couple of minutes to ensure all oil has drained into the sump and make a final check.
BE CAREFUL NOT TO OVERFILL WITH OIL. If it has, you can remove a small amount with the Pela.
- Refit the oil filler cap, remove all tools, rags etc from the engine bay.
- Start the engine, let it run for a few minutes, then stop it and check there are no leaks around the filter housing.
Close the bonnet.
- Congratulations - you have just done you own oil and filter change !
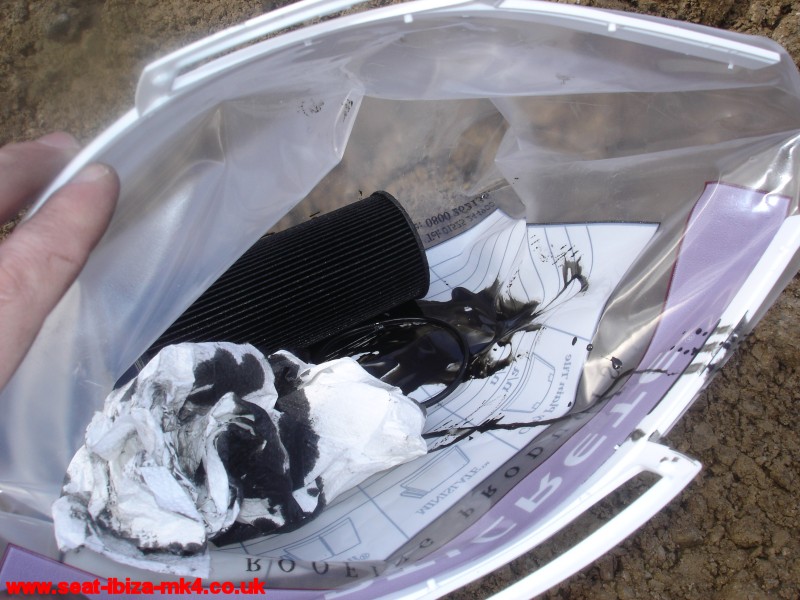
- Now you have to dispose of the rubbish. To give an idea of the oily mess you'll need to dispose of - see photo below:
- You will also need to dispose of the old oil. You should pour this into a suitable container, and take it to your local
tip. (Or leave it sat in one corner of the garage...) DO NOT put it in with the rubbish or pour it down a hole in the
ground or drain.
Tip: When pouring from the Pela to another container, do it over a newspaper. You WILL spill some !
- Finally - why not say hello to lots of fellow owners at the SeatCupra.net
forums !
|
|