| |
Replacing Front Shock Absorbers
on the Seat Ibiza Mk4
Thinking of changing the front shock absorbers on your Seat Ibiza Mk4 ?
This is a difficult task even for an experienced home mechanic, ideally requiring removal the RHS driveshaft. However,
it is possible to complete the task without doing this, and this guide shows how I managed to do it. However, it is certainly
not easy and does carry some risks.
DISCLAIMER: Follow this guide at your own risk. I accept no responsibility for any injury or damage that
may occur, or for any mistakes I might have made. If in doubt - get a professional to do the job ! Some of the techniques
shown in this guide are less than ideal and could easily cause damage or injury.
Tools Required
To complete this task, a fairly comprehensive tool kit will be required, including the following:
- Socket set with ratchet and extension bar, containing a range of sizes from 10-22mm
- Spark plug spanner, with a hex outer (see photos)
- Coil spring compressors
- Hub spreader tool (VW tool 3424) - this is highly recommended
- Trolley jack
- Axle stands x 2
- Small flat bladed screwdriver
- Pliers
- Molegrips
- Large adjustable spanner - or stilsons
- Knife
- Cable ties
- Hex keys - must be of good quality and strong. The OE shocks on my car used 7mm size, the replacements used 6mm.
- Wooden props or levering bars as required (see photos & descriptions...I did say this carries some risk !)
Other tools may be required.
How to do it
- Ensure the engine is off, the handbrake firmly applied, first gear is selected.
- Jack up the front of the car on both sides, and support securely with axle stands.
- Remove both front wheels.
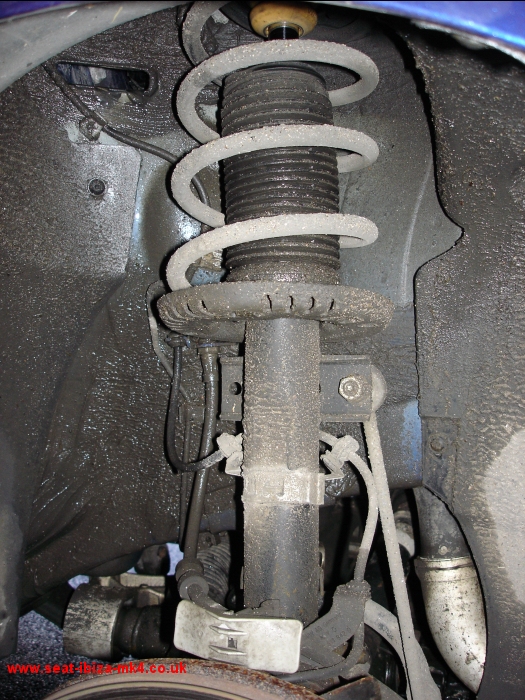
- The struts look like this (RHS shown):
- REMOVING THE LHS STRUT (the easier one)
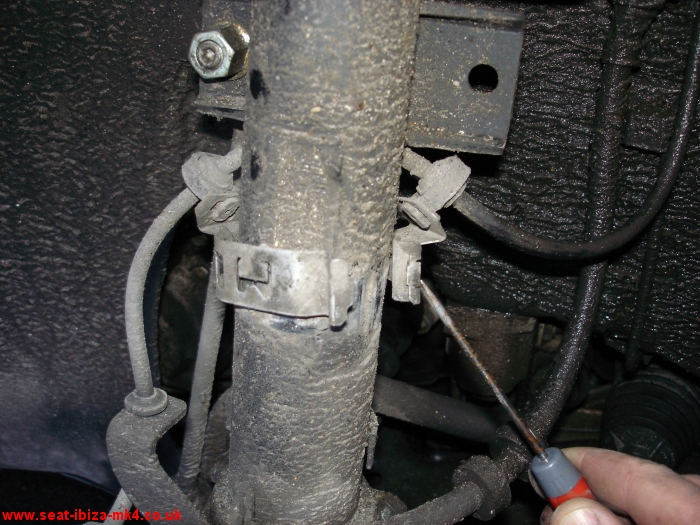
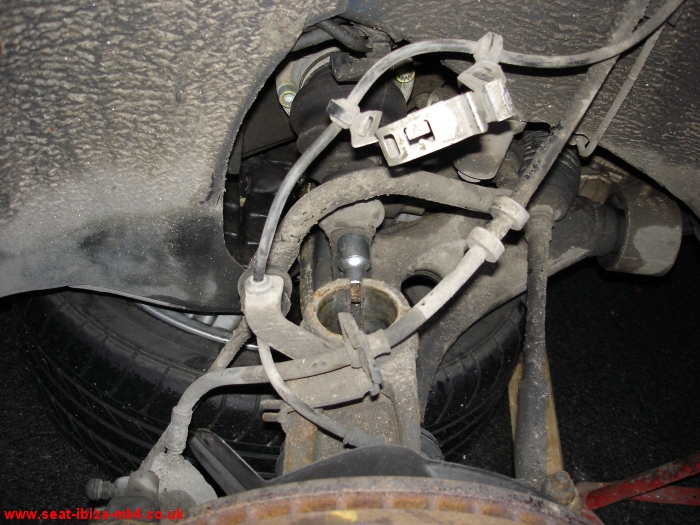
Using a small flat bladed screwdriver, release the clip holding the ABS wiring to the strut:
- Remove the nut holding the anti roll bar link to the strut, then lower the link out of the way:
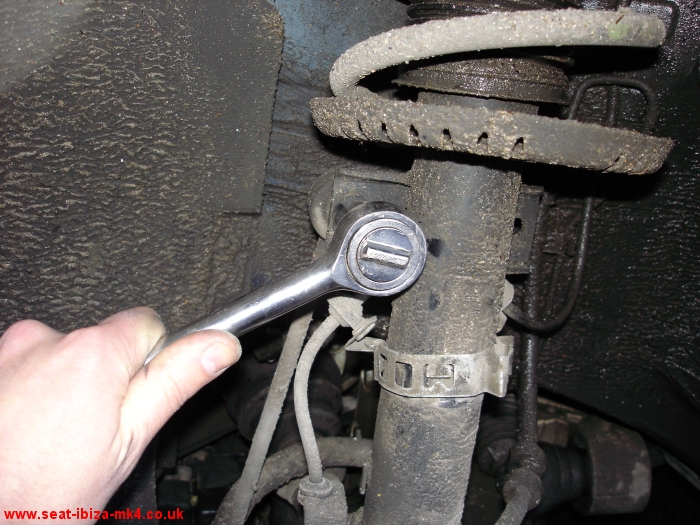
- Remove the hub bolt as in the following photo:

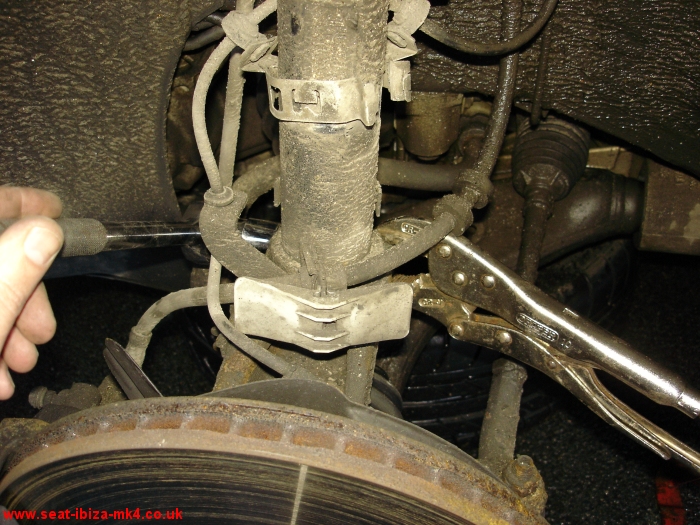
The other end of the bolt (shown in the following photo) is a splined type, and may turn as the other end is slackened:

To prevent the splined end turning, either use a correct splined tool, or alternatively hold using molegrips as in the
following photo:
- Open the bonnet, and remove the 3 bolts surrounding the top shock absorber mount.
- Insert the hub spreader tool in the gap at the rear of the hub, then rotate through 90° to spread the hub and release
the tightness on the bottom end of the shock absorber. When rotated into position, the tool should stay put without assistance.
- Lift the strut assembly out of the hub. This is easier than it sounds. You may need to push down hard on the hub/brake
disc assembly while lifting the strut - a bar or metal rod hooked under the anti roll bar can be used to lever the assembly
downwards.
Take care not to strain the brake lines or ABS sensor wiring.
Once freed from the hub, carefully withdraw the strut from the car.
The following photo shows the hub after the strut is removed - the hub spreader tool car be seen:
- REMOVING THE RHS STRUT (the difficult bit)
Release the ABS sensor wiring clip, the anti roll bar drop link, and hub bolt as for the LHS strut. Insert the hub spreader
tool.
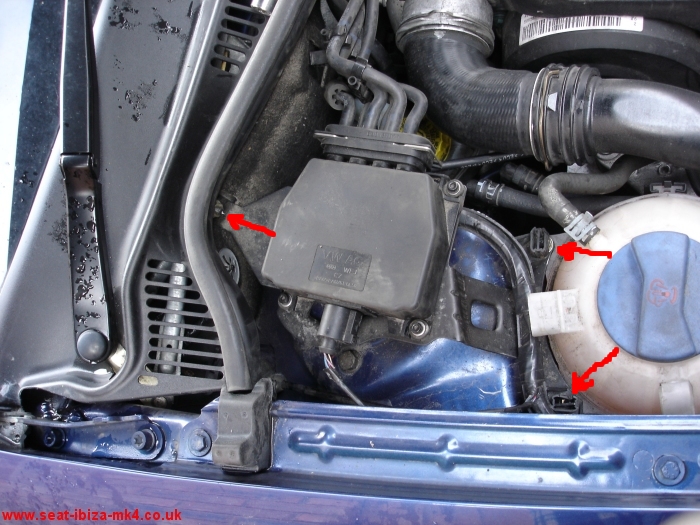
- To gain access to the 3 top mount bolts, the vacuum control assembly must first be moved.
Undo the 3 nuts arrowed in the photo:
- Now remove 2 of the 3 top mount bolts. Loosen the 3rd bolt but do not remove it.
- On the RHS, the driveshaft prevents the hub/brake assembly being dropped enough to release the strut, so some additional
steps are necessary.
- First, compress the coil spring using spring compressors.
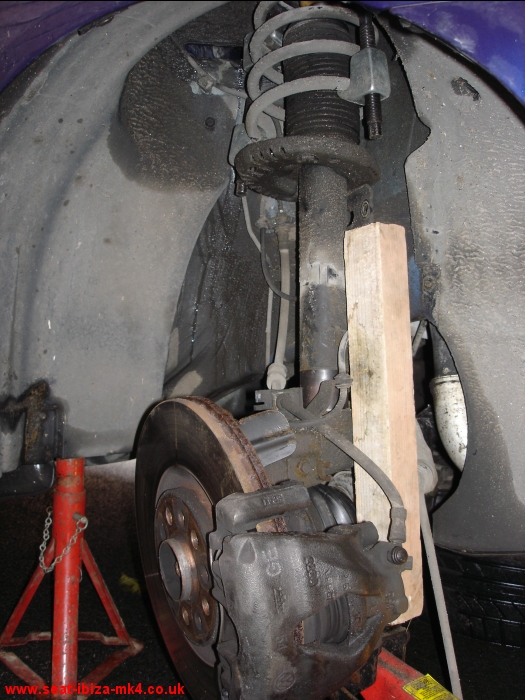
- As the hub assembly cannot be lowered, the strut must be raised to free it from the hub. I achieved this by carefully
jacking the strut up using a trolley jack and a section of 2x2 wood, as in this photo:
CAUTION: There is some force involved in this procedure and extreme care is required to prevent damage and injury, in
case something slips and lets go.
- After some struggling I managed to free the strut from the hub. The 3rd top mount bolt can be removed, and the strut
removed from the car.
- DISMANTLING THE STRUTS
The struts need to be dismantled, as the top mounts, dust covers and springs need transferring to the new shock absorbers.
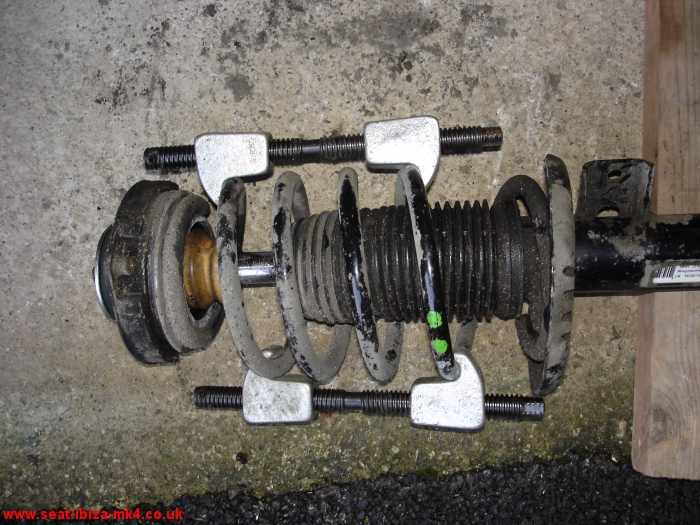
- First, ensure the spring is compressed sufficiently using spring compressors, so that no force is being exerted on
the top mount - as in the following photo:
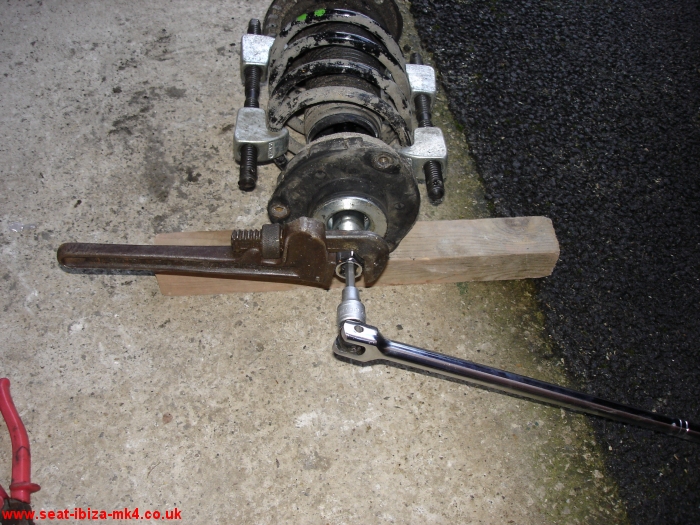
- Next, the top strut nut must be undone whilst the inner rod is held still.
I did this by using a spark plug socket held with stilsons to turn the nut, whilst holding the rod with a 7mm hex bit
passed through the middle, as in the following photo.
Make sure to use a high quality hex insert or allen key, to prevent rounding - as this would make life far more difficult
than it already is!
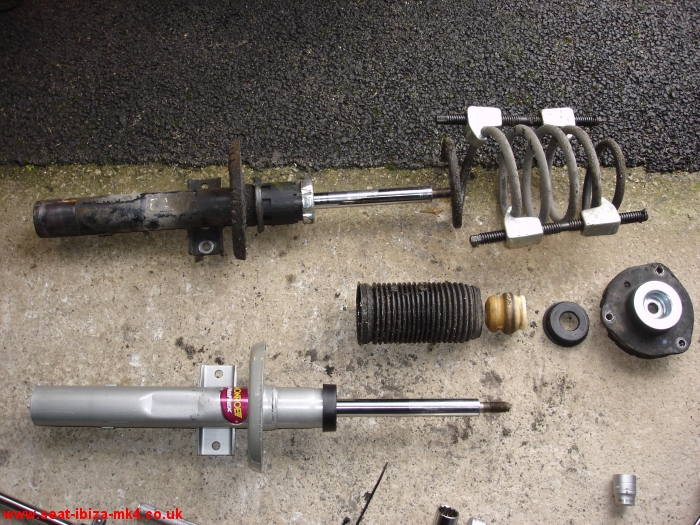
- After removal of the nut, lift the top mount, bump stop, spring and dustcover off the strut, as in this photo:
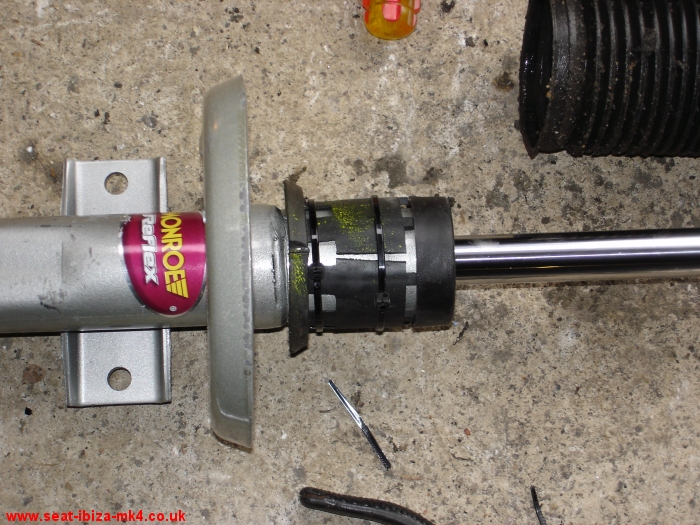
- The original strut has a plastic collar to which the bottom end of the dust cover clips over. The new struts didn't
have these, so I cut the original collars off and fitted them to the new struts, securing them with cable ties as in
this photo:
- Fit the dust cover, spring, bumpstop and top mount to the new strut. Bolt the top mount up tight using the spark plug
socket and hex key. Ensure the nut is fully tightened as far as it will go.
- Release the spring compressor if working on the LHS strut (it must stay in place on the RHS strut while refitting to
the car).
- REFITTING THE STRUTS (RHS first).
Offer up the RHS strut to the car and loosely fasten one of the top mount bolts.. Ensure the hub spreader is in place.
Refitting will be as difficult as removal was, if not more so. Again, I used lengths of wood and a trolley jack to achieve
this, though it did take considerable time. I must emphasize again that this procedure does pose a degree of injury &
damage risk if not thought through carefully.
- Once the strut has dropped into the hub, ensure the metal tab at the bottom of the strut lines up with, and drops into,
the split in the hub. Make sure the strut drops as far into the hub as it can go.
- Remove the spring compressors - ensure the bottom of the spring is correctly seated.
- Fasten all 3 top mount bolts fully. Refit the vacuum control unit.
- Remove the hub spreader. Refit the hub bolt, anti roll bar drop link, and ABS sensor wiring clip (use pliers to clip
together).
- Now offer up the LHS strut to the car. Loosely attach one of the top 3 mount bolts. Hopefully refitting the LHS strut
should be easier, just requiring the hub/brake assembly to be levered downwards as it was during removal.
- Once the strut has dropped into the hub, ensure the metal tab at the bottom of the strut lines up with, and drops
into, the split in the hub. Make sure the strut drops as far into the hub as it can go.
- Fasten all 3 top mount bolts fully.
- Remove the hub spreader. Refit the hub bolt, anti roll bar drop link, and ABS sensor wirring clip.
- Take a few minutes to make a final check that everything is correctly re-attached and secured, no nuts/bolts are left
unfitted, and that no tools are left attached ! (The hub spreader is easy to forget, as it's out of sight during use).
- Refit both front wheels. Lower the car to the ground, and double check the tightness of the wheel bolts.
|
|